

Photo Taking Editing Guidelines:
Please read these instructions prior to adding a pin. If you are new to Pin Pics do not even attempt to add a pin until you have 30 days of use.
A. Look up the pin you have and see if it is already listed. Do not re-add listed pins.
B. DO NOT COPY PHOTOS FROM OTHER SITES.
C. All photos are in .jpg format.
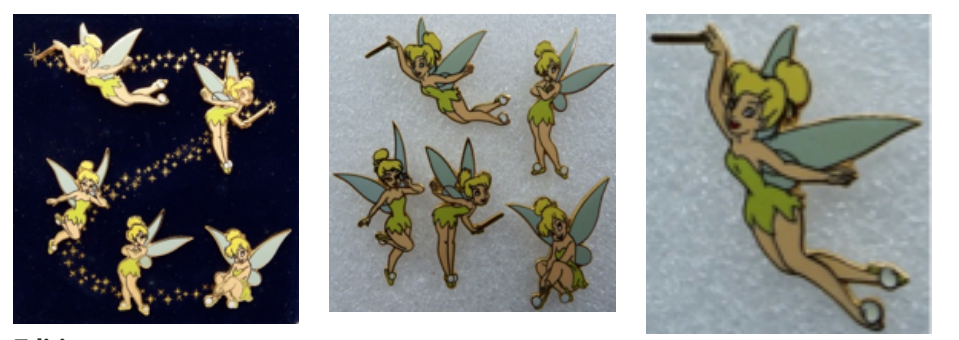
D. Pictures are of the actual pins and not the artwork.
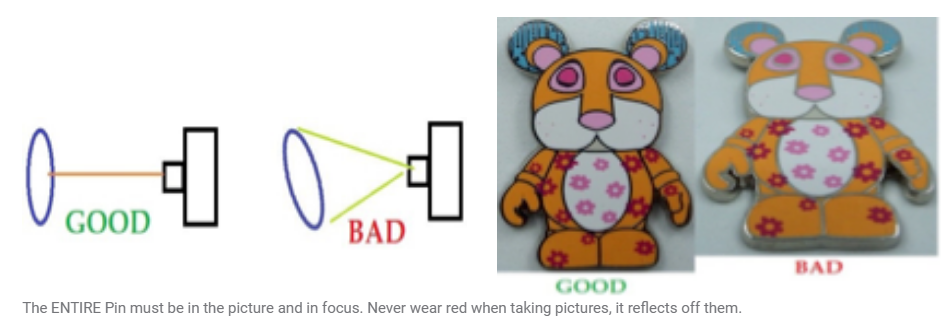
1. PICTURE BASICS: Clean the pin first! Make sure it is free of lint and dirt. Pictures must be taken with bright lighting. Bright lighting shows the most detail and gives clear, sharp images. We use LED’s with 5700°K or higher temperature lights. The background should be white. We have found the white open celled foam found in packaging works the best. Additional pictures can be taken on the card but the primary picture is of the pin not on a card. Make sure that you take the picture with the pin at 90° to the camera. This will keep the distortion at a minimum. Try to keep reflections and shadows at a minimum. (the white foam eats the shadows on Donald!)
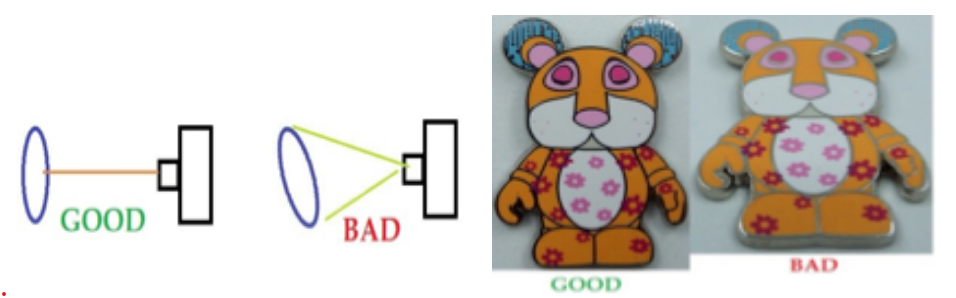

The ENTIRE Pin must be in the picture and in focus. Never wear red when taking pictures, it reflects off the pins.
General tips:
A. We use a Fuji Finepix SL1000 16M camera for taking pictures. It has a tiltable screen so its easy to view the pin as we take the picture to make sure that its in focus and little glare.
B. If you are using an iphone for the picture… Go into the iphone settings..... camera....Photo capture " Photographic Styles" and set your settings to VIBRANT. It makes the pictures come out the best.
C. We use a light box for taking pictures with the best lighting and shadow reduction. We use a Foldio 2 Plus light box with the extra LED’s.
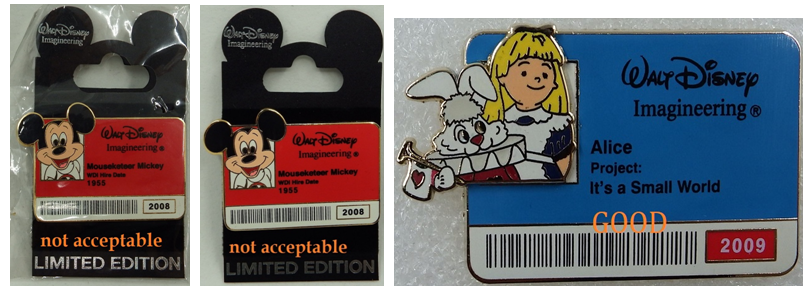
2. THE PICTURE: ALL individual pins should be on a uniform white background (white card, paper, white foam is preferred). Do not photo on the original card, black anything or through plastic wrapping. Please take the pin backs off!
Card mounted sets should be on the card and one picture of all the items on a white background together. Also take a picture of the individual pins on a white background for addition as individuals.
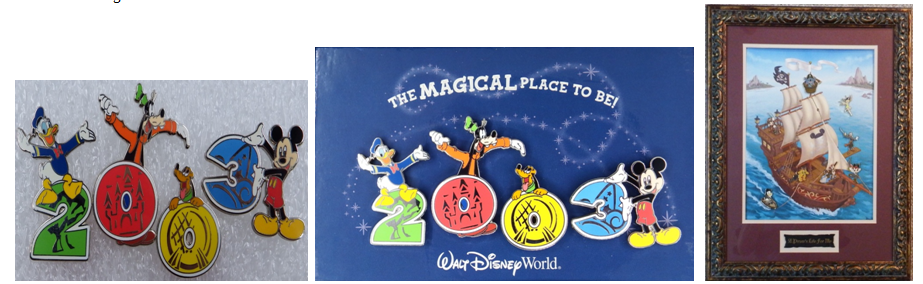
Disney framed sets do not need to be unframed. The picture should show the pins and the frame. Individual pins can be taken if available (submit separately following guidelines).
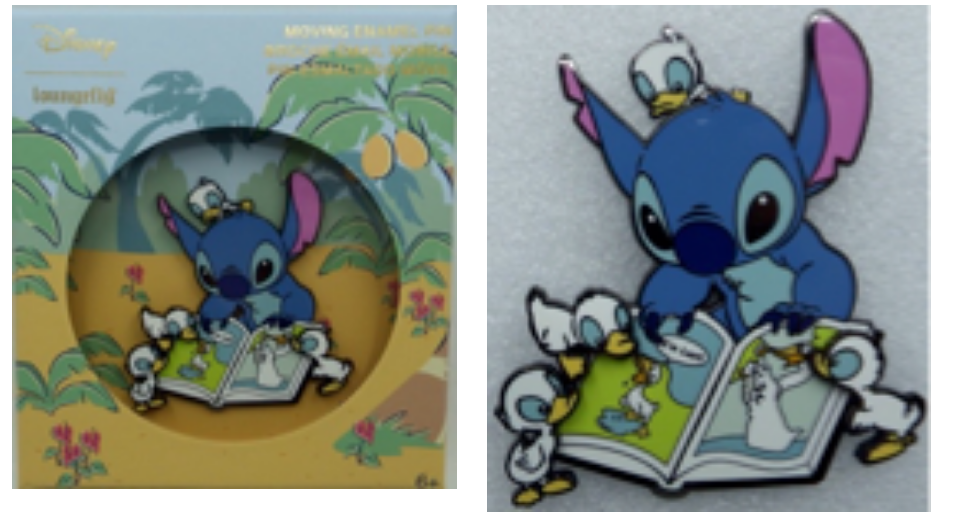
For single pin boxed items. A picture of the pin is preferred. The picture in the box may be added as a second picture.
Multi item boxed sets can have a picture of the pins on the original backing but the pins on a white background is preferred. Also take a picture of the individual pins on a white background for addition as individuals.
3. EDITING: Crop the photo to show just the pin (close to edge) and make sure that the pin is straight up and down. (rotate if necessary) This is a cropped high resolution photo. This gives the largest (most visible) picture possible.

4. SIZING: This is done automatically when the picture is uploaded.. No additional work is required.
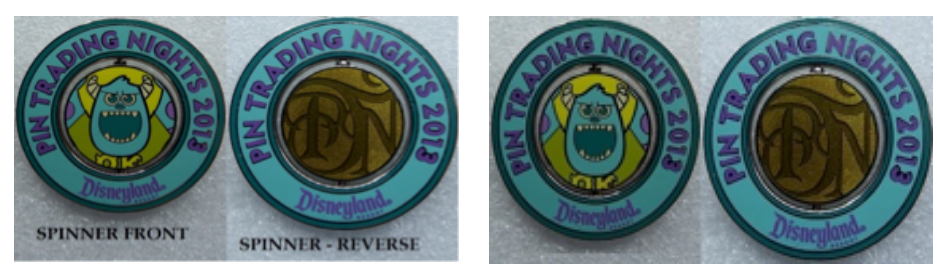
5. SPINNERS: Pins with spinners are a bit more complex. You will need to take a picture of the front and the front with the spinner reversed. Do not add the words! These pictures are separate and will be entered separately. (this will be picture #2 in the file) Also photograph the back of the pin and send it to info@pinpics.com so we can add it later.
Now that you have the picture ready you can start the pin addition process.
6. HINGED PINS: Take a picture of the front and then a picture of what is inside. Each picture will be cropped and entered separately. The inside picture does not need to have the back of the lid if there are not additional features.


The objective is to have the biggest pictures with the most detail possible.
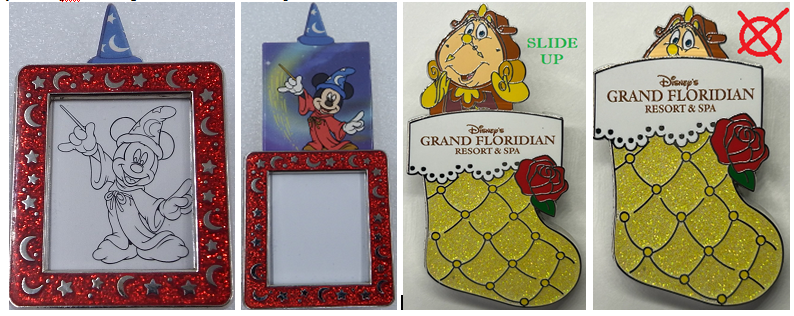
7. SLIDERS: The Mystery sliders that change the image should have (2) pictures. The majority of pins that have sliders will have just one pic showing the most detail on the pin.
8. Additional Pictures: They can be added when the pictures are submitted. The administrators can add additional pictures as required.
9. If you are submitting pictures for replacement please use the submission bar on the pin details. If you are sending 2nd or back pictures just mail them to info@pinpics.com with the pin number and we will add them.
-
 1
1